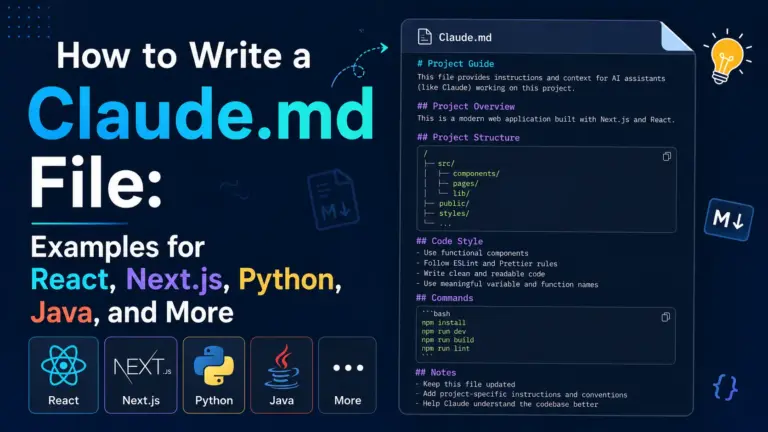
Last Tuesday, Claude Code rewrote one of my React hooks as a class component. Honestly, it was the fourth time that week… I mean, who even writes class components anymore unless you’re maintaining some legacy codebase from 2018? Anyway, I kept starting every session the exact same way. I’d explain my folder layout, remind it to use pnpm instead of npm, and fix the test commands it kept getting wrong. By the time I actually started writing real code, I’d already lost like fifteen minutes just on corrections.
That is when I finally sat down and wrote a CLAUDE.md file. The whole thing took me maybe ten minutes, but it completely changed my workflow. The very next session? Claude picked up my rules and just followed them. No corrections, no repeating myself. It was magical. I decided to put this guide together so you can do the exact same thing. I also threw in thirteen copy-paste examples covering everything from React and Next.js, to backend stacks like Python and Java, and even mobile platforms.
What Is a CLAUDE.md File and Why Does It Matter?
You know how when a new developer joins your team, you usually hand them some kind of setup document? A CLAUDE.md file works the exact same way, but for Claude Code instead of a person. You drop it in your project’s root folder, and Claude picks it up right when your session starts.
It loads your tech stack, your build commands, and your coding rules before you even type a single prompt. This means you don’t have to repeat yourself every single time. It’s a huge time saver.
Here is the thing about AI models that a lot of people forget: they don’t carry anything over from yesterday’s conversation. Every single chat starts completely from scratch. So the CLAUDE.md file ends up being the only piece of text that Claude actually sees in every session, and that makes it the single most important file in your project when you’re working with AI. But you have to keep it short and focused, because if the file gets too bloated, Claude just wastes tokens on it and ends up skipping over most of your rules anyway.
How Does Claude Code Read Your CLAUDE.md?
When you fire up Claude Code, it copies your CLAUDE.md straight into a system prompt. But here’s something most people don’t know: Claude Code also wraps your file in a hidden note that says the text “may or may not be relevant,” and it actually tells the AI that it can skip the whole thing if the instructions don’t seem to fit the current task.
That hidden note changes everything. If you fill the file with rules that don’t apply to the current job, Claude won’t just skip those specific lines. Instead, it’ll skip your entire file, including all the important rules you actually spent time writing. That is the real reason you need to keep this file short. It’s not just about saving space. It’s about making sure Claude doesn’t throw out everything you wrote.
What Should a Claude.md File Include?
After writing these files for about a dozen different projects, I’ve landed on three questions that every good CLAUDE.md needs to answer. All thirteen examples later in this guide follow this exact same structure.
- WHAT: Your tools, your folder layout, and where things live. This is especially important in big codebases where Claude needs to figure out which folder holds which app or package.
- WHY: Just a quick sentence about what the project actually does. Even one short line helps Claude make better choices about naming things and deciding where to put new code, so don’t skip this part.
- HOW: The exact commands you use to build, test, lint, and run the project. If you use
buninstead ofnpm, you need to say so right here because Claude simply can’t guess your commands on its own.
That covers the basics. Let’s talk about what you should actually leave out, because that part is just as important.
Five Rules for Writing a Good Claude.md
Over the past few months, I’ve been tweaking my own files and reading about what other teams do with theirs, and I’ve settled on these five rules that work every single time.
Keep It Short
AI models can handle about 150 to 200 instructions at a time, but here’s the catch: Claude Code’s own system prompt eats up around 50 of those slots before you even get started. So that leaves you with about 100 to 150 slots for your own rules, which honestly isn’t a lot when you think about it.
That’s why I keep the file under 300 lines, and shorter is always better. HumanLayer actually studied this pretty carefully, and they keep their root file under sixty lines for a reason. Every extra line you add to the file fights for attention against the lines you actually care about, so you want to be really selective about what goes in there.
Make Every Line Count
Since this file loads every single time you open a session, every rule in it needs to apply to every task you work on. So don’t shove database schema rules into a file that also covers CSS styling, because that’s just noise when you’re working on the frontend and it makes Claude less likely to follow the rules that actually matter.
I use a simple test on every line: if I delete this, will Claude start breaking things? And if the answer is no, I just cut the line right away.
And when a rule fails that test, I move it to a separate markdown file in a docs folder and then point to it from my CLAUDE.md. Claude will still find that file when it needs to, but the root file stays nice and lean.
Split Rules Into Separate Files
You really don’t need every single rule crammed into the root file. Some rules only matter for certain kinds of tasks, so it makes sense to put those in their own markdown files inside a folder like this:
agent_docs/
  |- building_the_project.md
  |- running_tests.md
  |- code_conventions.md
  |- database_schema.md
Then all you have to do is list those files in your CLAUDE.md with a short one-line summary for each one, and tell Claude to read the right file before it starts working. That way, Claude only pulls in the extra context when it actually needs it, and your base file stays clean and focused.
Don’t Use Claude to Format Code
I see people stuffing code style rules straight into their CLAUDE.md all the time, and it’s honestly a waste. Your linter and your formatter already handle this job, and they’re faster, cheaper, and way more reliable because they don’t make things up. So don’t burn your limited context window space on something that Prettier or ESLint can already do for free.
Now if you really want Claude involved in formatting for some reason, you can set up a Claude Code Stop hook that runs your formatter automatically after every edit. That way your tools handle the spacing and formatting, and Claude can focus on writing the actual code logic instead.
Write It by Hand
Claude Code has an /init command that auto-generates a file for you, but honestly, you should skip it. The generated files tend to come out pretty bloated and full of generic rules that sound nice on paper but don’t actually match how you work. The problem is that even one bad instruction in this file will mess up every single session going forward, so it’s really worth the ten minutes to just write the file yourself from scratch.
CLAUDE.md vs AGENTS.md: Which One Should You Use?

AGENTS.md is basically the open-source version of CLAUDE.md, and it works in Cursor, Aider, Windsurf, Copilot, and Claude Code. So if your team bounces between multiple AI coding tools, AGENTS.md gives you just one place for all your rules instead of having to manage five different config files, which is a lot easier to maintain.
The good news is that Claude Code reads both files anyway. So just stick with CLAUDE.md if Claude Code is the only tool you use, and switch to AGENTS.md if you use multiple tools. The rules for writing a good one are exactly the same either way, so you don’t have to learn anything new.
Where to Place Your CLAUDE.md Files?
You can actually put this file in three different spots, and which one you pick depends on what you’re trying to do.
- Global (
~/.claude/CLAUDE.md): These are your personal preferences that apply to every project you touch. It’s a good spot for things like “always use pnpm” or “always explain trade-offs before making a choice.” - Project root (
./CLAUDE.md): This is where your team’s rules and standards go. You put your build commands, folder maps, and dependency rules here, and then commit it to git so everyone on the team gets the same behavior from Claude. - Subfolder (
./packages/api/CLAUDE.md): These are rules for specific parts of a bigger project. Claude reads the closestCLAUDE.mdwhen it works in a subfolder, so your backend rules stay completely separate from your frontend config, which is really helpful in monorepos.
How to Write a Claude.md for Different Types of Projects
Let’s get to the actual examples. I’ve put together a ready-to-use template for each major stack, and you can just grab the one that’s closest to your project, paste it into a new CLAUDE.md file, and then tweak the details to match your setup. Most of them work with just a few small changes.
Claude.md Example for React Projects
# Project: TaskBoard UI
## Overview
A React 19 task management dashboard for small teams. Optimizes for fast rendering and accessibility.
## Tech Stack
- React 19 with TypeScript (strict mode)
- Vite 6 for bundling
- React Router v7
- Zustand for state management
- Vitest + React Testing Library for tests
## Project Structure
- /src/components -- reusable UI components
- /src/pages -- route-level page components
- /src/hooks -- custom React hooks
- /src/stores -- Zustand stores
- /src/utils -- helper functions
## Commands
- Dev server: `npm run dev`
- Run tests: `npx vitest run`
- Lint: `npm run lint`
- Type check: `npx tsc --noEmit`
## Rules
- Use functional components only. No class components.
- Keep components under 150 lines. Split into smaller components if needed.
- Use named exports, not default exports.
- All props must have TypeScript interfaces defined.
- Run type check before finishing any task.
Claude.md Example for Next.js Projects
# Project: MarketplaceApp
## Overview
A Next.js 15 e-commerce marketplace with server-side rendering. Optimizes for SEO and page load speed.
## Tech Stack
- Next.js 15 (App Router)
- TypeScript strict mode
- Tailwind CSS v4
- Prisma ORM with PostgreSQL
- NextAuth.js v5 for authentication
## Project Structure
- /app -- App Router pages and layouts
- /app/api -- API route handlers
- /components -- shared UI components
- /lib -- database client, auth config, utilities
- /prisma -- schema and migrations
## Commands
- Dev server: `npm run dev`
- Build: `npm run build`
- Database migrate: `npx prisma migrate dev`
- Generate Prisma client: `npx prisma generate`
- Run tests: `npx vitest run`
## Rules
- Prefer Server Components. Use "use client" only when the component needs browser APIs, state, or event handlers.
- All database access goes through /lib/db.ts. Never import Prisma directly in components.
- API routes return consistent JSON shape: { data, error, status }.
- Use Zod for all request validation.
- Keep page components thin. Business logic goes in /lib.
Claude.md Example for Python Projects
# Project: DataPipelineService
## Overview
A Python data processing service that ingests CSV and JSON files, transforms them, and loads results into PostgreSQL. Runs as a scheduled job on AWS Lambda.
## Tech Stack
- Python 3.12
- Poetry for dependency management
- FastAPI for the HTTP layer
- SQLAlchemy 2.0 with async support
- Alembic for database migrations
- Pytest for testing
## Project Structure
- /src/api -- FastAPI route handlers
- /src/services -- business logic
- /src/models -- SQLAlchemy models
- /src/repositories -- database access layer
- /src/schemas -- Pydantic request/response schemas
- /tests -- test files mirroring src structure
- /alembic -- migration scripts
## Commands
- Install deps: `poetry install`
- Run dev server: `poetry run uvicorn src.main:app --reload`
- Run tests: `poetry run pytest -x --tb=short`
- Lint: `poetry run ruff check .`
- Format: `poetry run ruff format .`
- New migration: `poetry run alembic revision --autogenerate -m "description"`
## Rules
- Type hints on every function signature. No exceptions.
- All database queries go through the repository layer, not in route handlers.
- Use async/await for all I/O operations.
- Write a test for every new endpoint and service function.
- Never use print() for logging. Use the configured logger from src/core/logging.py.
Claude.md Example for Java Projects
# Project: OrderManagementAPI
## What This Does
Spring Boot REST API that handles orders, stock, and customer data for our e-commerce site. Feeds a React frontend and two mobile apps.
## Tech Stack
- Java 21
- Spring Boot 3.4
- Gradle (Kotlin DSL)
- Spring Data JPA with PostgreSQL
- Flyway for database migrations
- JUnit 5 + Mockito for testing
## Where Things Live
- /src/main/java/com/app/controller -- REST controllers
- /src/main/java/com/app/service -- business logic
- /src/main/java/com/app/repository -- JPA repositories
- /src/main/java/com/app/model -- entity classes
- /src/main/java/com/app/dto -- request/response DTOs
- /src/main/java/com/app/config -- Spring configuration
- /src/test -- test files
## How to Run
- Build: `./gradlew build`
- Run: `./gradlew bootRun`
- Test: `./gradlew test`
- Lint: `./gradlew checkstyleMain`
## Rules
- Follow the controller-service-repository pattern strictly. Controllers never touch repositories directly.
- Use records for DTOs when possible.
- Every public method in service classes must have a corresponding unit test.
- Use constructor injection, not field injection with @Autowired.
- Return ResponseEntity with proper HTTP status codes from controllers.
- Database column names use snake_case. Java field names use camelCase. Map with @Column annotations.
Claude.md Example for Kotlin Android Projects
# Project: FitTracker
## Overview
An Android fitness tracking app built with Kotlin and Jetpack Compose. Tracks workouts, displays progress charts, and syncs data with a REST API.
## Tech Stack
- Kotlin 2.0
- Jetpack Compose for UI
- Material 3 design system
- Hilt for dependency injection
- Room for local database
- Retrofit + OkHttp for networking
- Kotlin Coroutines + StateFlow for async and state
## Project Structure
- /app/src/main/java/com/fittracker/ui -- Compose screens and components
- /app/src/main/java/com/fittracker/viewmodel -- ViewModels
- /app/src/main/java/com/fittracker/data/local -- Room entities, DAOs, database
- /app/src/main/java/com/fittracker/data/remote -- Retrofit API interfaces
- /app/src/main/java/com/fittracker/data/repository -- repository implementations
- /app/src/main/java/com/fittracker/di -- Hilt modules
## Commands
- Build: `./gradlew assembleDebug`
- Run tests: `./gradlew testDebugUnitTest`
- Lint: `./gradlew lintDebug`
## Rules
- All UI is Jetpack Compose. No XML layouts.
- Use StateFlow for observable state in ViewModels. No LiveData.
- All network calls go through repository classes. ViewModels never call Retrofit directly.
- Use Hilt @Inject constructor for all dependencies.
- Use Timber for logging. Never use Log.d() or println() in production code.
- Navigation uses Compose Navigation with type-safe route arguments.
Claude.md Example for C++ Projects
# Project: SignalProcessor
## Overview
A real-time audio signal processing library written in C++23. Used as a shared library by desktop and embedded applications.
## Tech Stack
- C++23
- CMake 3.28+
- vcpkg for package management
- Google Test for unit testing
- clang-format and clang-tidy for code quality
## Project Structure
- /src -- implementation files (.cpp)
- /include/signal -- public headers (.hpp)
- /tests -- unit tests
- /benchmarks -- performance benchmarks
- /cmake -- custom CMake modules
## Commands
- Configure: `cmake -B build -S . -DCMAKE_TOOLCHAIN_FILE=$VCPKG_ROOT/scripts/buildsystems/vcpkg.cmake`
- Build: `cmake --build build`
- Run tests: `cd build && ctest --output-on-failure`
- Format: `clang-format -i src/*.cpp include/signal/*.hpp`
## Rules
- Use RAII and smart pointers (std::unique_ptr, std::shared_ptr). No raw new/delete.
- All public APIs must have Doxygen-style documentation comments.
- Use std::span instead of raw pointer + size pairs for buffer parameters.
- Prefer constexpr and compile-time computation where possible.
- Error handling uses std::expected for recoverable errors and exceptions for programming errors.
- Keep header-only utilities in /include/signal/detail/ namespace.
Claude.md Example for Swift iOS Projects
# Project: MealPlanner
## Overview
An iOS meal planning app built with SwiftUI. Users create weekly meal plans, generate grocery lists, and save favorite recipes.
## Tech Stack
- Swift 6.0
- SwiftUI for all UI
- Swift Data for persistence
- Swift Concurrency (async/await, actors)
- Swift Package Manager for dependencies
## Project Structure
- /MealPlanner/Views -- SwiftUI views organized by feature
- /MealPlanner/Models -- Swift Data model classes
- /MealPlanner/Services -- networking and business logic
- /MealPlanner/ViewModels -- ObservableObject view models
- /MealPlanner/Utilities -- extensions and helpers
- /MealPlannerTests -- unit tests
## Commands
- Build: `xcodebuild -scheme MealPlanner -destination 'platform=iOS Simulator,name=iPhone 16' build`
- Test: `xcodebuild -scheme MealPlanner -destination 'platform=iOS Simulator,name=iPhone 16' test`
## Rules
- All UI is SwiftUI. No UIKit unless wrapping a component that has no SwiftUI equivalent.
- Use @Observable macro for view models (Swift 6 Observation framework).
- Use structured concurrency with async/await. No completion handlers.
- All network requests go through the NetworkService actor.
- Follow Apple Human Interface Guidelines for spacing, typography, and navigation patterns.
- Test all ViewModel logic. Views do not contain business logic.
Claude.md Example for Frontend Projects
# Project: DesignSystemUI
## Overview
A shared component library and design system for three web applications. Built as a standalone package published to a private npm registry.
## Tech Stack
- TypeScript strict mode
- React 19
- Storybook 8 for component documentation
- Vanilla Extract for type-safe CSS
- Vitest + Testing Library for tests
- Changesets for versioning
## Project Structure
- /src/components -- all shared components
- /src/tokens -- design tokens (colors, spacing, typography)
- /src/hooks -- shared React hooks
- /src/utils -- helper functions
- /stories -- Storybook stories
- /tests -- component tests
## Commands
- Dev (Storybook): `npm run storybook`
- Build: `npm run build`
- Test: `npx vitest run`
- Lint: `npm run lint`
- Type check: `npx tsc --noEmit`
## Rules
- Every component must have a Storybook story.
- Components accept a className prop for style overrides. No inline styles.
- All color values come from design tokens. No hardcoded hex values.
- Accessibility: every interactive element must have ARIA labels and keyboard support.
- Export all public types from the package root index.ts.
Claude.md Example for Backend Projects
# Project: PaymentsAPI
## Overview
A Node.js backend service handling payment processing, subscription management, and webhook events for a SaaS product.
## Tech Stack
- Node.js 22
- TypeScript strict mode
- Fastify 5 web framework
- Drizzle ORM with PostgreSQL
- Stripe SDK for payments
- Vitest for testing
- pnpm for package management
## Project Structure
- /src/routes -- Fastify route handlers
- /src/services -- business logic
- /src/db -- Drizzle schema, migrations, and queries
- /src/middleware -- auth, rate limiting, error handling
- /src/workers -- background job processors
- /src/types -- shared TypeScript types
## Commands
- Install: `pnpm install`
- Dev server: `pnpm dev`
- Build: `pnpm build`
- Test: `pnpm test`
- Migrate DB: `pnpm db:migrate`
- Generate types: `pnpm db:generate`
## Rules
- All route handlers validate input with Zod schemas before processing.
- Business logic lives in /src/services. Route handlers are thin.
- All Stripe webhook events must be verified with the signing secret before processing.
- Use database transactions for any operation that touches multiple tables.
- Sensitive config (API keys, secrets) comes from environment variables. Never hardcode them.
- Log with structured JSON using the configured Pino logger.
Claude.md Example for Web Development Projects
# Project: CraftPortfolio
## Overview
A multi-page portfolio and blog website for a freelance designer. Optimizes for performance, SEO, and visual quality.
## Tech Stack
- Astro 5 (static site generator)
- TypeScript
- Vanilla CSS with custom properties
- MDX for blog content
- Sharp for image optimization
## Project Structure
- /src/pages -- Astro page routes
- /src/layouts -- page layout templates
- /src/components -- reusable Astro and HTML components
- /src/content -- MDX blog posts and portfolio entries
- /src/styles -- global CSS and design tokens
- /public -- static assets (fonts, favicons, images)
## Commands
- Dev server: `npm run dev`
- Build: `npm run build`
- Preview build: `npm run preview`
## Rules
- Ship zero JavaScript to the client unless a component absolutely requires interactivity.
- All images use Astro's Image component for automatic optimization and lazy loading.
- CSS uses custom properties for colors, spacing, and typography. No utility-class frameworks.
- Every page must pass Lighthouse performance, accessibility, and SEO audits at 90+ scores.
- Blog posts use frontmatter for title, date, description, and tags.
Claude.md Example for Full Web App Projects
# Project: TeamSync
## Overview
A full-stack project management web app with real-time collaboration. Teams create projects, assign tasks, and communicate through threaded comments.
## Tech Stack
- Next.js 15 (App Router) for frontend and API
- TypeScript strict mode
- tRPC for type-safe API layer
- Prisma ORM with PostgreSQL
- NextAuth.js v5 with GitHub and Google OAuth
- Socket.io for real-time updates
- Tailwind CSS v4
## Project Structure (Monorepo with pnpm workspaces)
- /apps/web -- Next.js application
- /packages/db -- Prisma schema, client, and migrations
- /packages/api -- tRPC router definitions
- /packages/ui -- shared React components
- /packages/config -- shared ESLint and TypeScript configs
## Commands
- Install: `pnpm install`
- Dev (all packages): `pnpm dev`
- Build: `pnpm build`
- Test: `pnpm test`
- DB migrate: `pnpm --filter @teamsync/db migrate`
- DB seed: `pnpm --filter @teamsync/db seed`
## Rules
- All database queries go through tRPC procedures. No direct Prisma calls in components.
- Prefer Server Components. Mark with "use client" only for interactivity.
- Real-time events use the Socket.io client in /apps/web/lib/socket.ts only.
- Authentication checks happen in tRPC middleware, not in individual procedures.
- New features get a branch, a PR, and at least one test before merging.
Claude.md Example for Android Projects (Java)
# Project: CampusConnect
## Overview
An Android social networking app for university students. Built with Java and XML layouts following MVVM architecture. Connects students by interests, courses, and campus events.
## Tech Stack
- Java 17
- Android SDK 35 (min SDK 26)
- Gradle (Groovy DSL)
- MVVM with ViewModel and LiveData
- Retrofit 2 + Gson for networking
- Room for local database
- Dagger Hilt for dependency injection
## Project Structure
- /app/src/main/java/com/campusconnect/ui -- Activities, Fragments, Adapters
- /app/src/main/java/com/campusconnect/viewmodel -- ViewModels
- /app/src/main/java/com/campusconnect/model -- data models and Room entities
- /app/src/main/java/com/campusconnect/repository -- repository classes
- /app/src/main/java/com/campusconnect/network -- Retrofit interfaces and API client
- /app/src/main/res -- XML layouts, drawables, and resources
## Commands
- Build: `./gradlew assembleDebug`
- Run tests: `./gradlew testDebugUnitTest`
- Run instrumented tests: `./gradlew connectedDebugAndroidTest`
- Lint: `./gradlew lintDebug`
## Rules
- Follow MVVM strictly. Activities and Fragments observe LiveData. They do not call repository methods directly.
- Use ViewBinding for all layout references. No findViewById().
- All network calls go through repository classes with proper error handling.
- Room database operations run on background threads using Executors or coroutines.
- Use string resources for all user-facing text. No hardcoded strings in Java files.
Common Mistakes When Writing a Claude.md
After looking at a bunch of broken config files from other developers, I’ve noticed that most of them share the same handful of problems. So here’s what usually goes wrong and how to avoid it.
- Copying your entire README into the file. READMEs are written for humans who are browsing your GitHub repo. But a
CLAUDE.mdis for an AI that writes code, so the audience is completely different. You should strip out everything except the commands and rules that Claude actually needs to follow. - Adding a rule after one bad output. Claude wrote a class component once, and now you want to add “never use class components” to the file. But that’s not a pattern yet. I only add a new rule when I see Claude repeat the exact same mistake across three or four sessions in a row, because anything less than that could just be a one-off thing.
- Vague instructions like “write clean code.” Claude already knows how to write clean code, so lines like that don’t add any value. They just take up space and push your real rules further down in the file where they’re easier for Claude to miss.
- Letting the file go stale. You migrated from React Router v6 to v7 three months ago, but you never updated the config file. So now Claude keeps writing v6 patterns and you waste time fixing them. I make it a habit to review my file at the start of each sprint to catch things like this.
- One file for a massive monorepo. I learned this one the hard way. I wasted about twenty minutes one afternoon because the root-level Go rules were confusing Claude while it was working on my React frontend code. And the fix was really simple: I just created separate config files in each subfolder and the problem went away.
How to Build a Claude.md for Any Project
All thirteen examples above share this same skeleton, so you can just copy it and fill in your own details. The whole process takes about ten minutes, and it works for pretty much any stack.
# Project: [Name]
## Overview
[One to two sentences: what the project does, who it serves, what it optimizes for.]
## Tech Stack
[Bulleted list of languages, frameworks, and key tools.]
## Project Structure
[Map of the main directories and what each one contains.]
## Commands
[Exact commands for dev, build, test, lint, format, and migrate.]
## Rules
[Five to ten project-specific coding rules that Claude needs to follow.]
That template has worked for every stack I’ve used so far. You just fill in the five sections, tweak the rules so they match your actual workflow, and then give Claude enough context to work on its own without overwhelming it. The goal is always to give it just enough information and nothing more than that.
What if Claude Keeps Ignoring My Claude.md?
This is almost always a length problem. Either the file has too many rules in it, or the rules you wrote don’t match the kind of task you’re giving Claude. And remember that hidden “may or may not be relevant” note I mentioned earlier in this article? If Claude decides your file doesn’t apply to the current task, it just drops the entire thing. So the fix is to cut the file down to only the rules that matter for every session, and then move everything else into separate markdown files.
Can I Have Multiple CLAUDE.md Files in One Project?
You absolutely can, and I’d actually recommend it for anything bigger than a single-package repo. Claude Code checks both the root folder and whatever subfolder it’s currently working in, and it grabs the nearest CLAUDE.md file and layers those rules on top of the root ones. My team’s monorepo currently has three of these files, one for each package, and it keeps everything clean and separate.
 Frenzy Gym Gift Codes (July 2026)
He is a computer engineer by day and a gamer by night. He has played many different games, like retro games like Contra, classic Mario, to AAA games. He likes to share his passion for gaming through his guides.